Interface Description - Project Editor - Menu Bar
The "Menu Bar" is located at the top of the interface, there are 4 menus, selecting the commands in the menu can execute the corresponding operations. A gray icon in the menu indicates that the function is currently unavailable.
Documentation
The "File" menu includes: Save Project, Save As, Auto Save, Generate Zip, Embedded Software, Share, and Verify.

Save Project
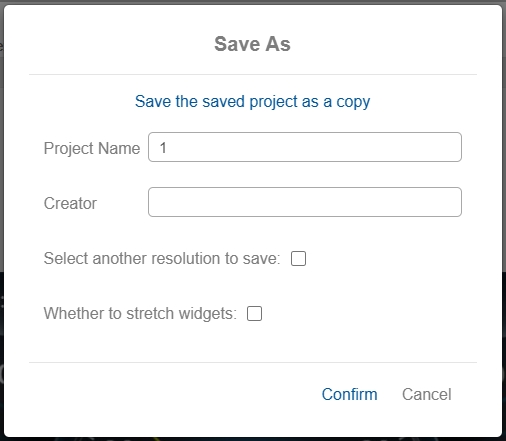
Click "Save Project", you can save the current project in the cloud platform, the upper right corner of the interface will pop up the "Save Success" message, next time you log in, you can open the project and continue editing. Support shortcut key "Ctrl+s" to save project. **Save As By clicking "Save As", you can save the project as a copy and redefine the project name and author. Users can choose a different resolution from the original project and calculate the horizontal and vertical scale of the corresponding layers and control dimensions according to their needs. For example, if the resolution of the original project is 800×600, and if you choose a resolution of 800×400 when saving as, you need to set the height ratio to 1:1.5.
Autosave
Click "Auto Save", in the pop-up dialog box, you can choose whether to save the project automatically at regular intervals to prevent the user from losing the unsaved project in the editing due to the window closing and other problems. Users can choose to save the project every 10, 30 or 60 minutes, and if you don't, the default is no auto-save.

Generate zip package
Click "Generate Package", in the pop-up dialog box, select the type of the generated project package. The available types are: Regular, Compressed, Local, Template, and Estimated file size.

Compressed project package, boot animation and other controls will be compressed again when the integration software is burned on the board, the file takes up less storage space. The compression type will reduce the screen display effect.
Local project package, you can copy the project package to the project list under the folder of the local version of IDE software, or drag and drop it to the project list of the local version of Personal Center to realize the conversion between local and online editing.
Template format will save the project as a template to be imported in other project editing.
Estimated file size function will not produce the project package, only the size of the generated project package in default format will be popped up in the upper right corner of the interface, and users can decide whether to use compressed format or not according to the estimated value.
After confirming the generation of the project, a message of "Successful Generation" will pop up in the upper right corner of the interface, and a dialog box for saving the packaged file will appear at the same time, so you can generate a local project package by selecting the save address.
Embedded Software
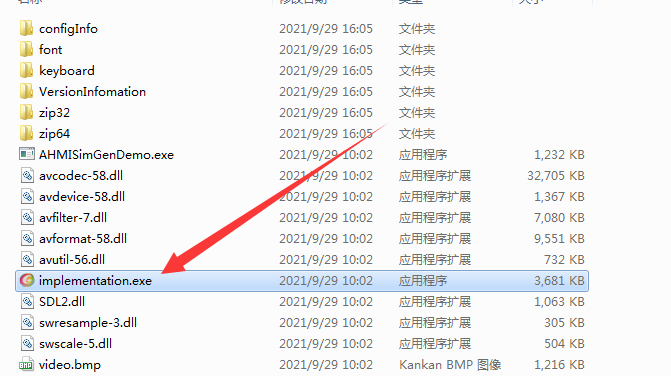
Click "Embedded Software", select "Confirm" in the pop-up dialog box to download the embedded driver file (simplified version of the integrated programming tool software) compressed package to match the current IDE version, unzip the file and double-click the Double click "implementation.exe" to open.
Share Click "Share", the message of sharing project will pop up in the upper right corner of the interface, after clicking open sharing, the sharing path and password will appear, the sharing initiator will share the path and password to the person who needs to share, and then the person who needs to share will enter the link in the browser, enter the password and then you can edit the project.
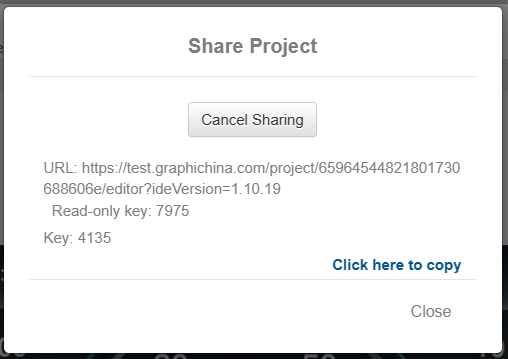
However, when this project is being edited by other, in order to ensure the consistency of the project status, at the same time, only one user is allowed to edit the project by sharing, other users can not access the project, you need to take the initiative to contact the current operator. It is necessary to make a distinction: an account logging in two places at the same time will not cause conflict, but the content of the project will be subject to the latter.


Calibration
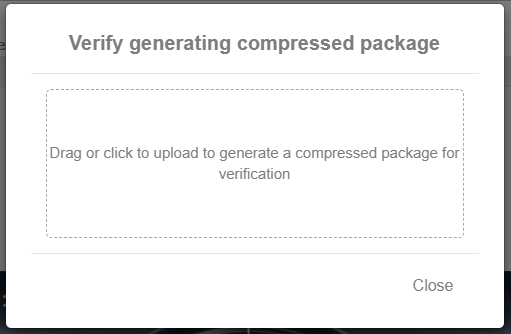
Click "verify", you can verify whether the local zip package is IDE editing directly generated file package, in the pop-up dialog box to upload the zip package needs to be verified, according to the project package contains all the files generated by the hash value of the verification, you can display the file legitimacy.
Editor
The "Edit" menu includes: Add Window, Add View, Undo, Redo, Copy, Paste, Add Controls, Cut, Delete, Sort, Select All, Find, Clear, Visualize Actions, Open Emulator. The common "Ctrl+X" shortcut is supported.

Select a page and click "Add Window" to add a window to the current page, which has a view by default.
Select a window and click "Add View" to add a view to the current window.
Click "Undo" to cancel the previous step.
Click "Redo" to restore the undone operation.
Click "Delete" to delete the currently selected page, window, view or control.
Select a view, click "Add Control", a drop-down list of controls will appear, click the control icon in the list, you can add a control to the current layer, and at the same time in the upper right corner of the interface pop-up message "Add Widget Successfully". The message "Widget added successfully" pops up at the top right corner of the interface. How to use each control will be introduced in detail in "Advanced Design - Controls Description" section.
Click "Copy", "Cut", "Paste" to copy, cut and paste the currently selected object, which can be a window, view or control.
Click "Sort", a drop-down list will appear, you can "move up one level", "move down one level", "move to top level", "move to bottom level" operations on the currently selected object. Move to Top", "Move to Bottom" operations can be performed on the currently selected object to change the order of the objects in the page.
Click "Select All" to select all windows or controls. This depends on the currently selected object in the Layer List: if the currently selected object in the Layer List is a page or window, then "Select All" will select all windows; if the currently selected object is a view or control, then "Select All" will select all windows; if the currently selected object is a view or control, then "Select All" will select all windows. If the current selection is a view or a control, then "Select All" will select all controls in the layer.
Click "Find", enter the name of the page, window, view or control you want to find in the drop-down text box, press the Enter key to confirm, you can find all the contents of the project with the same name, click the "Up" and "Down" icons can be sequentially selected. Click the "Up" and "Down" icons to select the contents of the search in turn. Note: you need to enter the complete name, does not support the fuzzy search function.
Click "Clear" to delete windows or controls in batch. Similar to "Select All", if the current selection in the layer list is a page or a window, all windows will be cleared; if the current selection is a view or a control, all controls in the view will be cleared.
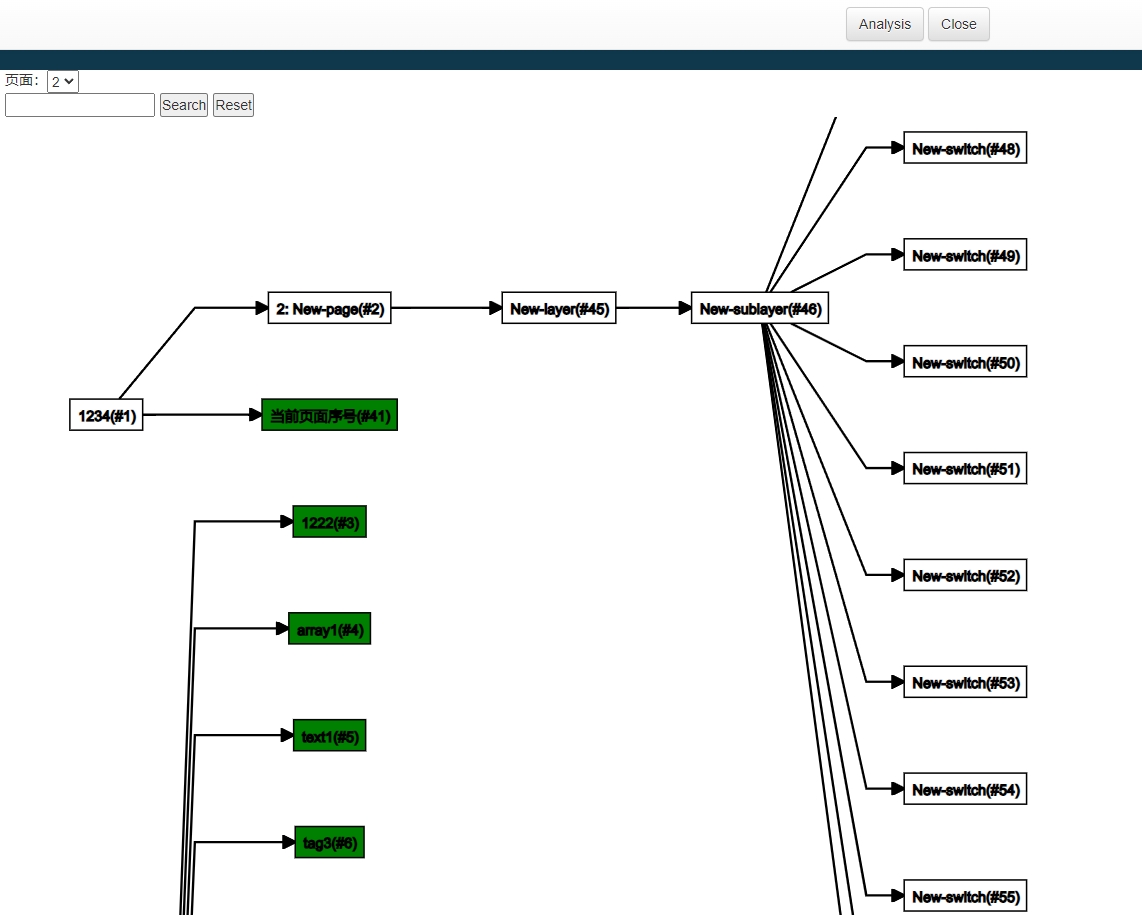
Click "Action Visualization" to enter the action analysis interface. Click "Analyze", the timing diagram of the current interface will appear, reflecting the timing of different elements, tags, timers, actions and commands. The analysis diagram can be downloaded locally for users to analyze the logic of the interface.
Click "Open Emulator", it will enter the run debugging interface, you can debug all the controls on the page, this part will be detailed in the "Run Debugging" section. This part will be introduced in detail in the "Run Debug" section.
Show
The "Display" menu allows you to select different interface display effects, whether to display auxiliary lines and mold boxes. Click on the ruler to show or hide the ruler, and drag the horizontal and vertical lines from the ruler to locate the target. Click the mold box to show or hide the mold box, which is used to preview how the interface will look like in the mold. Users can set the name, position, width and height of the mold box. (Coordinates X, Y are the coordinates of the left vertex of the mold box.) It is also possible to directly upload a picture of the mold box.

Help
The "Help" menu includes: Newbie Guide, Documentation, and Downloads.

Beginner's guide
The "Beginner's Guide" is divided into Module Introduction and Beginner's Tutorial, users can learn to start IDE according to their needs. In the IDE interface, there are several hovering function introduction icons, click on them to read the detailed description.

Documentation
Click "Documentation" to enter the IDE documentation, which introduces IDE functions and usage in detail. It is suitable for users to learn and understand systematically.
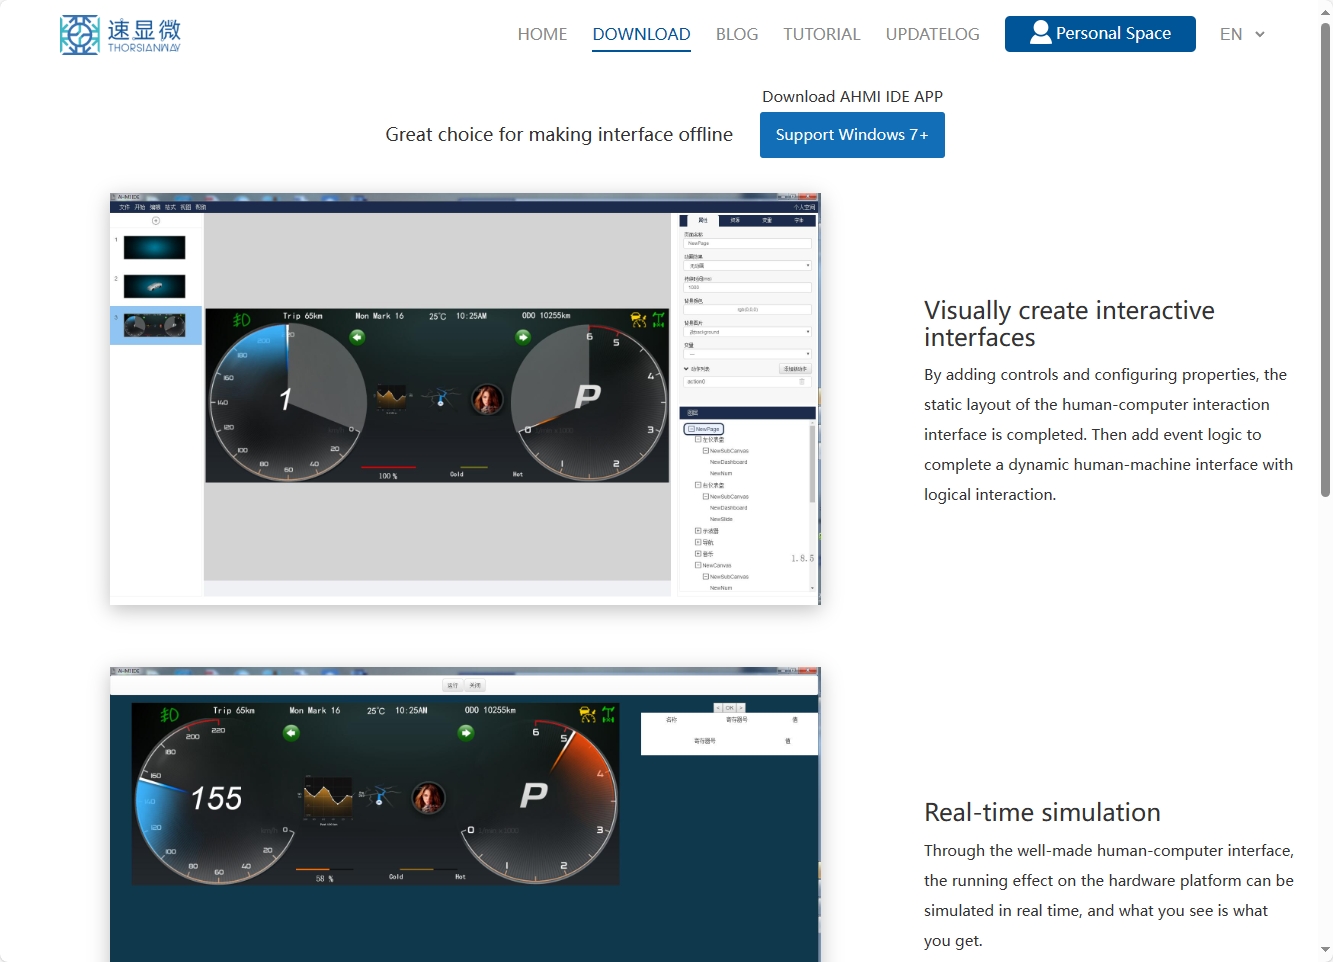
Download
Click "Download" to enter the download interface, users can download the local version of the IDE software, support offline state to create the interface.
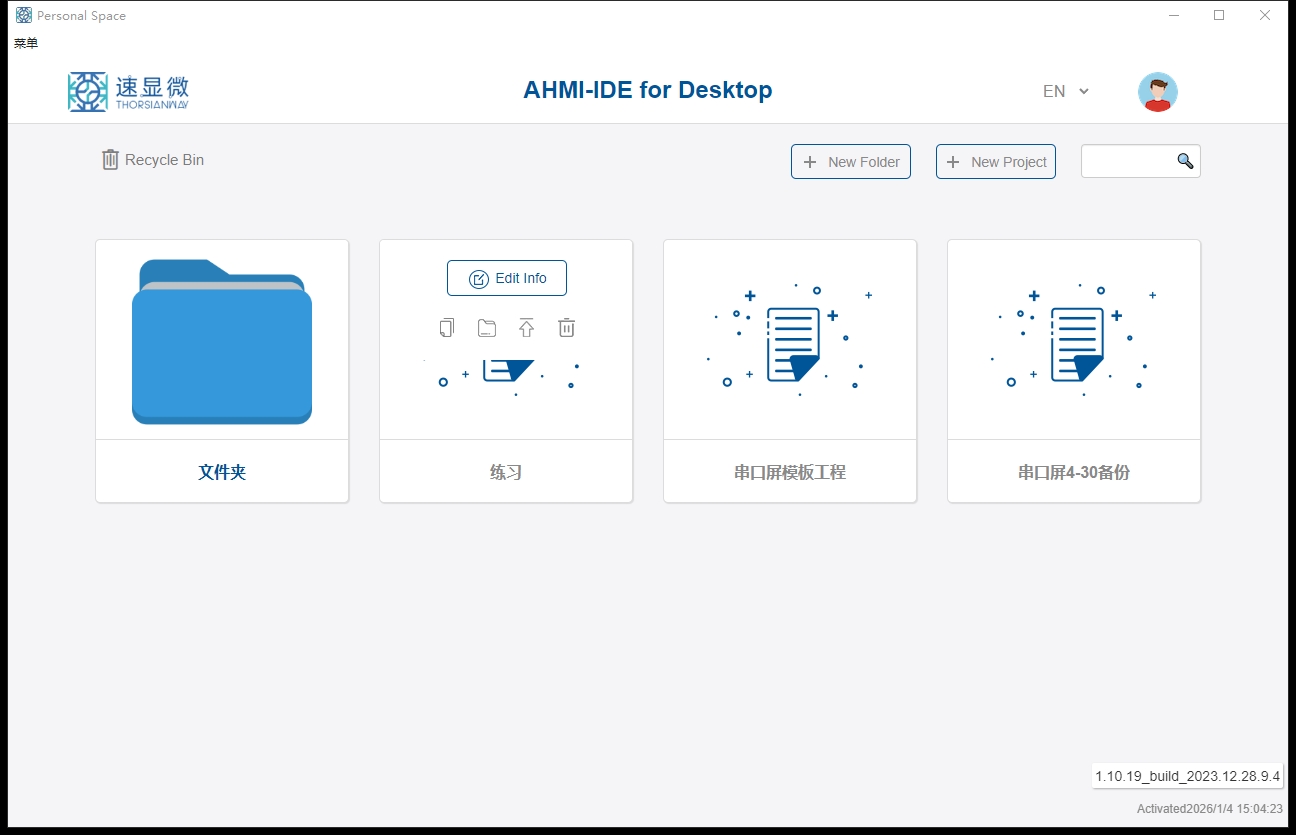
It is possible to share projects between local IDE and web IDE, which is described in Local Upload section. Unzip the zip file, click the application "Speed Micro AHMI-IDE", and run the local version of the IDE.

The interface of the local IDE is as follows:
Desktop version generates file storage location and content
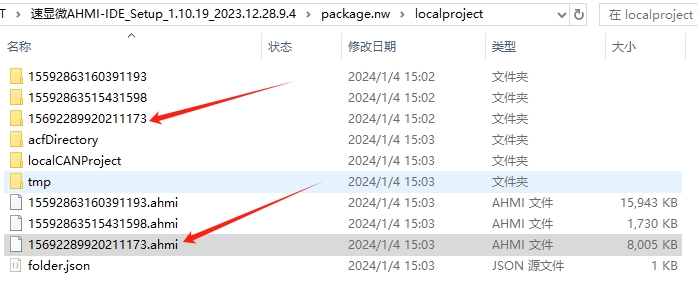
AHMI IDE desktop version of the saved project is stored in: speed micro AHMI-IDE/package.nw/localproject/ path, each project has a folder, the saved folder name is a string of numbers. Under the project directory, there are: resources, project.json and thumbnail. resources is all the resources in the project, project.json is the control file, and thumbnail is the icon of the project in the personal center.