Interface Description - Project Editor - Property Bar
The "Property Bar" is located in the upper right side of the interface, and is divided into four columns: Properties, Resources, Variables, and Fonts.
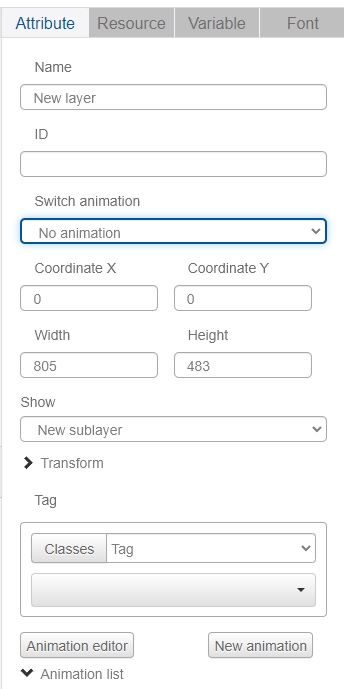
Properties
Displays information about the properties of the currently selected object (page, window, view, or control), including the object's name, position, size, texture, bound variables, actions, and so on. The property editing method of a control varies according to the type of control, and the meaning and setting method of each control will be described in detail in the "Advanced Design - Control Description" section.
Resources
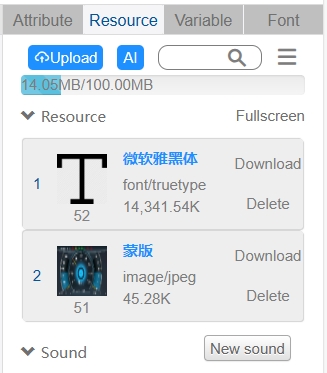
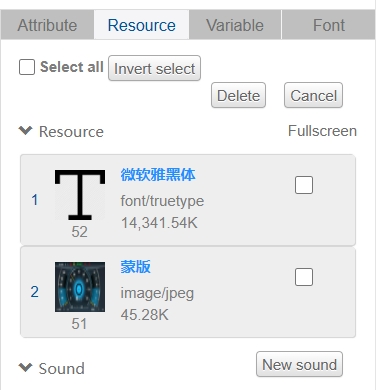
Display user uploaded resources, support PNG, JPG, JPEG common image types. ttf fonts. Note: The system does not support background with transparency, if user uploads an image with transparency as the interface background, the background will be shown as completely opaque.
Click on the "Upload Resources" button and the "Open" window will appear:
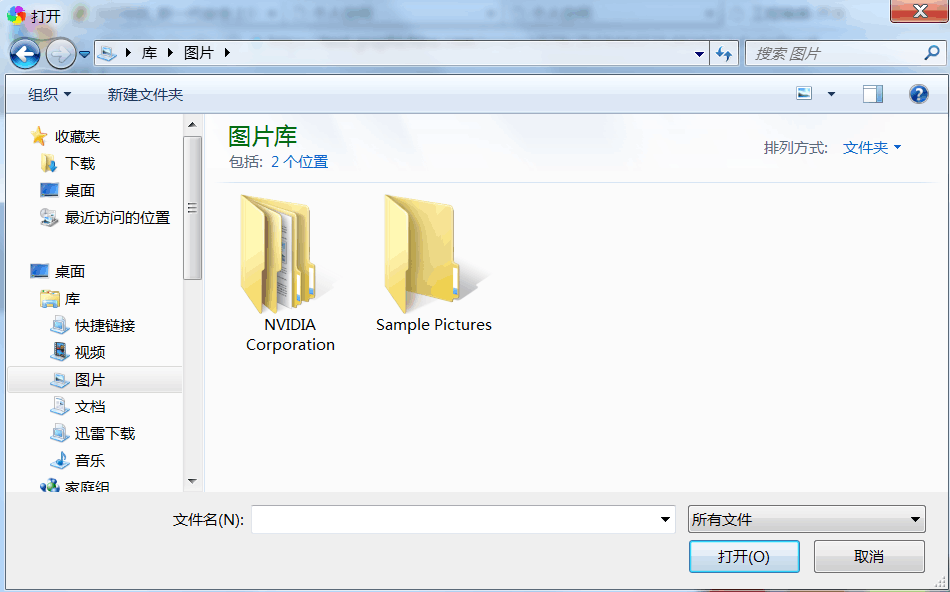
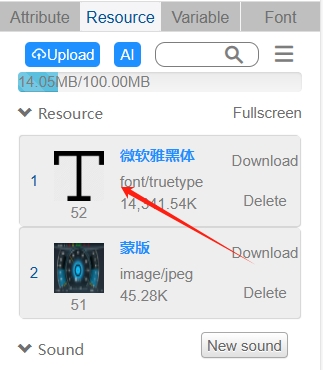
Select the picture to be uploaded, click "Open", you can see the picture preview, picture name, size, file format and other information in the resource list, the file being uploaded will show the upload progress in "Operation", the file that has been uploaded will show the delete button. button ![]() , click delete button to delete the file.
, click delete button to delete the file.
Each project is allowed to upload up to 100MB of resources, IDE will automatically calculate the total size of the uploaded files, and remind the user in the form of numbers and progress bars.
Support font resource upload, after the upload is completed, users can use custom uploaded font format, currently supports ttf font resource upload and use.
Support for modifying resource names.
Support fuzzy search, input the name in the search box to search for resources, and the matches will be displayed in the search results.
Support resource download, you can download the resources in the current project to local.
Support batch operation, after clicking "Batch Operation", a checkbox will appear for batch deletion.
Variables
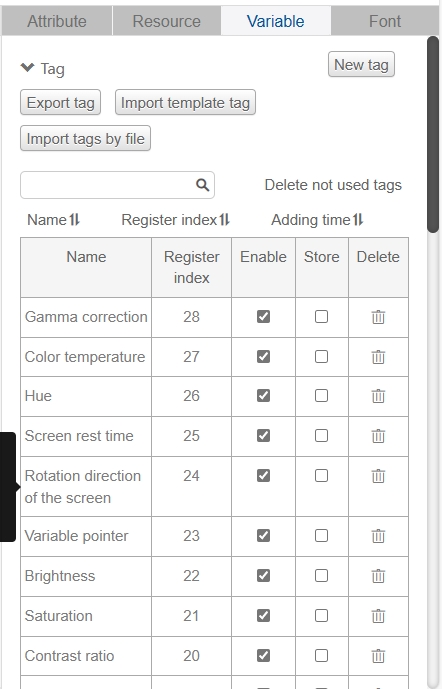
By default, there are two types of variables in the "Variable Bar" list: variables (tag) and timers. You can add new tag categories through the Tag Manager. Selecting a tag category in the "Tag" drop-down menu displays all tagged variables of that category in the current project.

Each variable can be bound to more than one control, and changing the value of the variable can control all the controls it is bound to.
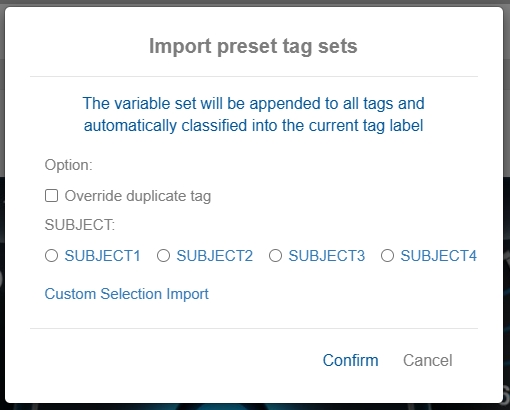
You can manually add variables one by one by using "Add New Variable" (it is recommended that the register number of manually added variables be incremented from 1000), or you can choose to import a preset set of variables from "Import Template Variables", and the "Export Variables" function can generate an excel file, which includes the user-defined variables, the system default variables and the system default variables. The "Export Variables" function can generate an excel file, which includes user-defined variables, the serial number, binding register number, maximum value, minimum value, current value and other information of the system default variables, as well as whether the variables are enabled or not, and whether the variables are reused. The "File Import Variables" function allows you to add new variables in batch through the excel sheet.
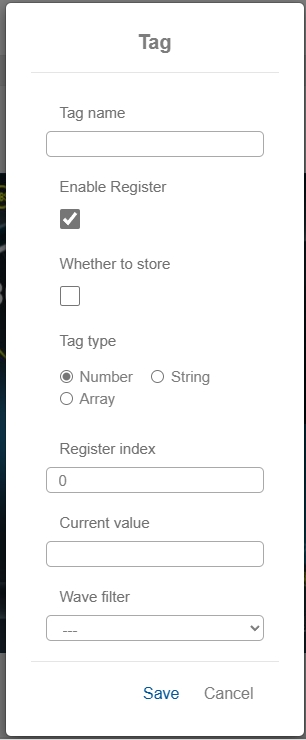
Click "Add New Variable", the "Variable" dialog box will pop up. Input the name of the variable, if you need to read/write the register (read the value from outside or output the variable to peripheral), you need to check "Enable Register". If you need to read or write registers (read or write values from outside, or output variables to peripheral devices), you need to check "Enable Registers", enter the number of the register, and if you need to write the value to FLASH (power-off storage), you need to check "Whether or not to store". You can set the initial value of the variable and whether to enable the filter. Click "Save" to finish editing the variable.
Supports importing variable sets. Users can preview and import the system's preset variable sets by clicking the "Import tag" button.
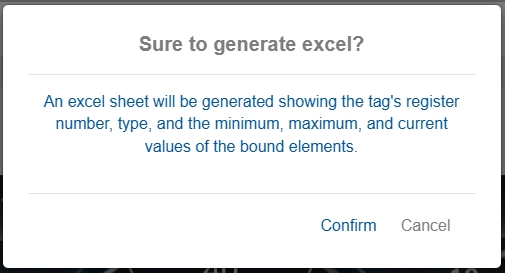
Support to export the variable list of the current project, click "Export tag" button, a dialog box will pop up, after confirming, the variable list file in excel format will be generated.
Support file import variables, using a pre-prepared excel table can batch import custom variables, here need to pay attention to the excel table requires that the first column is the variable name, the second column is the first column corresponds to the register number, in addition to the excel table file needs to be ".xlsx" format.


In the variable list, you can see all the set variables and their basic information. Clicking on the variable name will bring up the "Variables" dialog box, where you can modify the properties of the variable.
In the variable list, you can also enable/disable the registers, sort the variables according to the bound register number, modify the variable label, and delete the variables. Note: When deleting a variable, if the variable is not bound to a control, it will be deleted directly; if the variable is already bound to a control, the system will indicate that it cannot be deleted.
Hover over the variable name to display the current bound registers and whether the variable is enabled or not.
The system has the following default variables, the default variable name can not be modified, and the user can not delete:
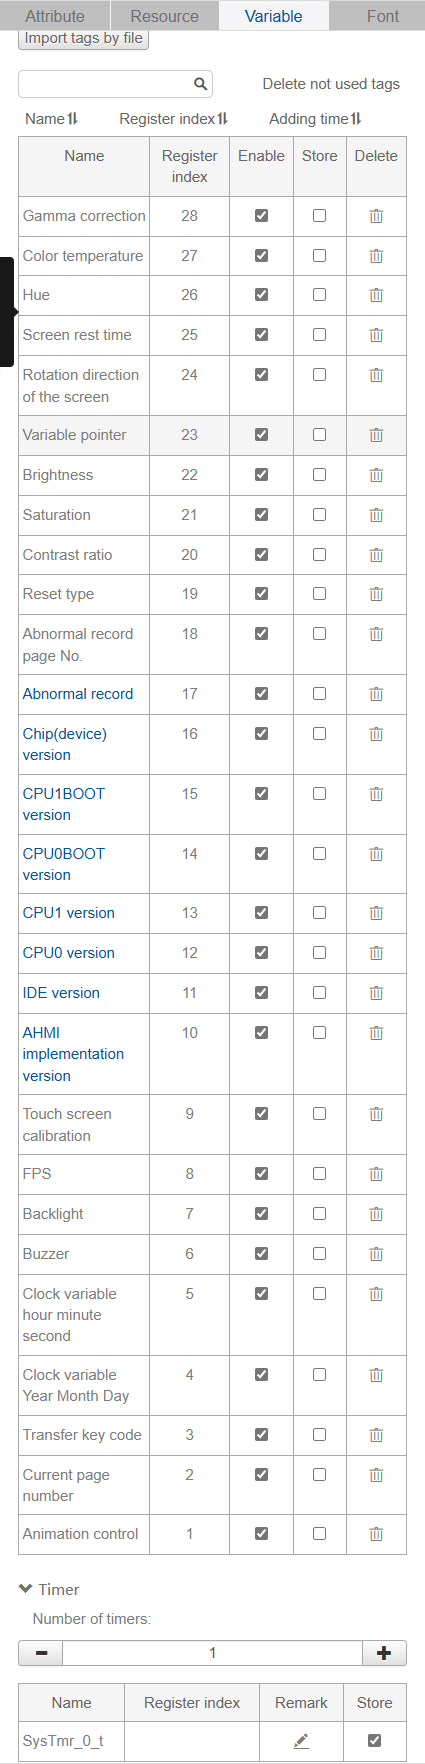
"Video" variable: automatically bound to the video control, the value of the variable controls the first video input.
"Current Page Number" variable: does not appear in the variable list of the control binding and the variable list of the command, used to control the jump page.
"Pass keycode": used with the key handling task, does not appear in the variable list of the control binding or in the variable list of the command.
"Clock variable year, month and day" and "Clock variable hours, minutes and seconds": In line with the system's internal clock, time information is transmitted.
"Buzzer" variable: control whether the buzzer works or not.
"Backlight" variable: Controls whether the screen backlight works or not.
"Frame Rate" variable: Controls the project frame rate.
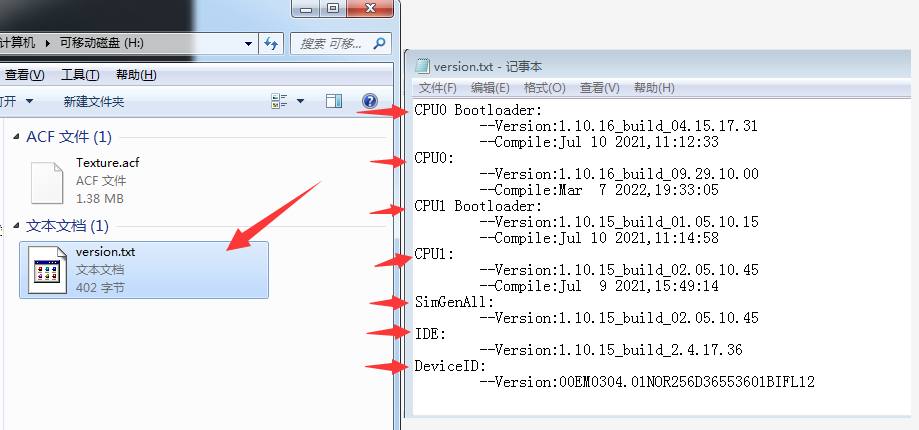
"Integration Software Version", "IDE Version", "CPU0 Version", "CPU1 Version", "Chip (Device) Version" variables are used for the TCP/IP system. ", "IDE version", "CPU0 version", "CPU1 version", "Chip (device) version" variables are used in the version file automatically generated after burning ACF file on TF card, users do not need to use these variables directly.
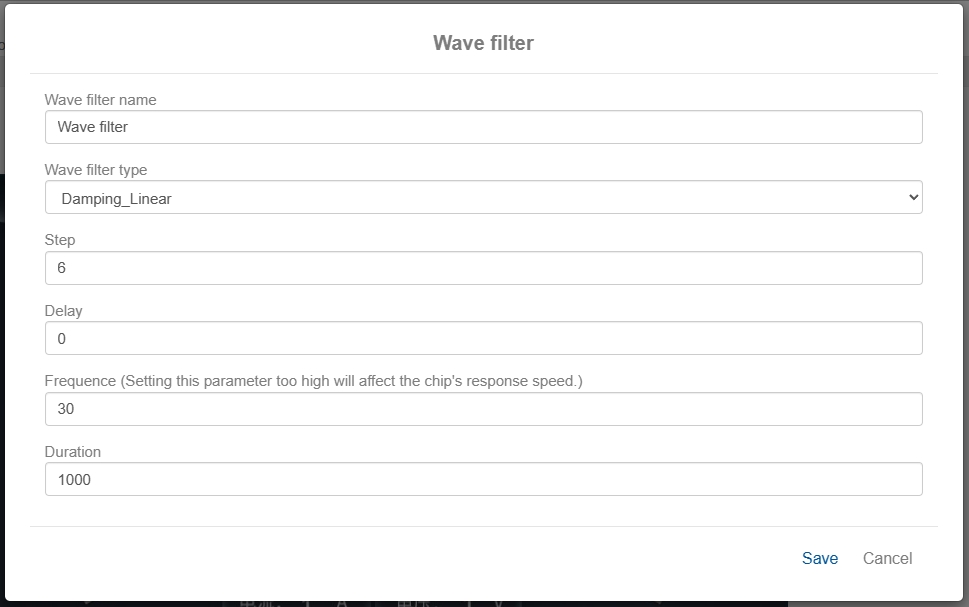
Click "Add New Filter" to bring up the Filter Edit dialog box. There are three types of filters to choose from, and filter settings require related professional knowledge, so we won't go into details here, if you have any needs, please contact Speed Micro (company website: www.graphichina.com).
The setting method of timer variable is the same as tag variable, after clicking the name, you can edit it in the "Variable" dialog box. **Note: The maximum number of timers that can be set in each page is 10.

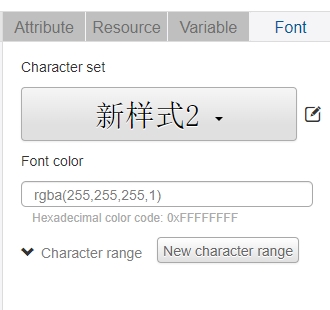
Fonts
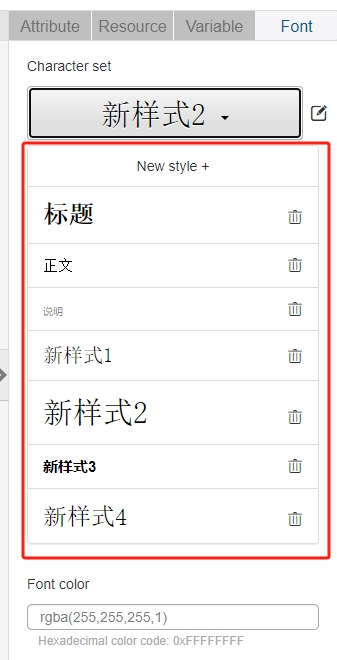
Character Set Function: If you use a large number of controls with font attributes in your project, and you need to modify the font styles at a later stage, in order to avoid modifying the font styles manually one by one, we have developed the Character Set Function Module. Here you can click "Add Style+" to add a new character style, or you can directly select one of the character styles, and the font properties of the control will change after you select it. In this way, if we bind the same "Character Style" to the controls with font attributes that display the same style, then the font display effect of those controls will be changed when we change the character style later.
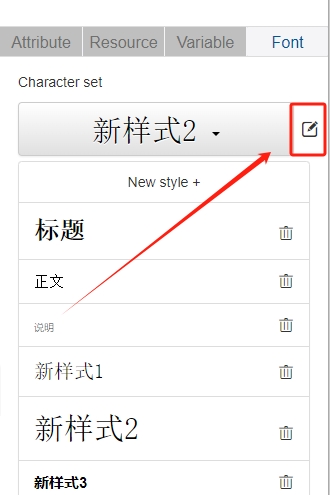
Click the "Style Edit" button in the character set to edit the style.
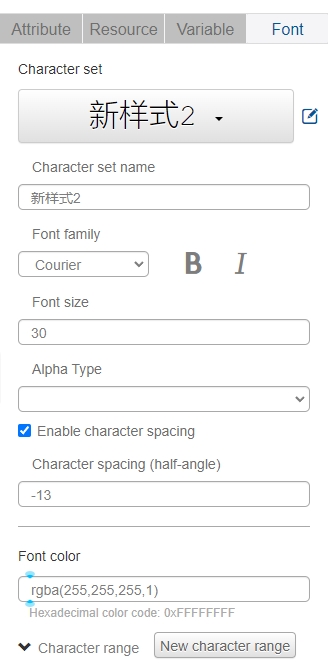
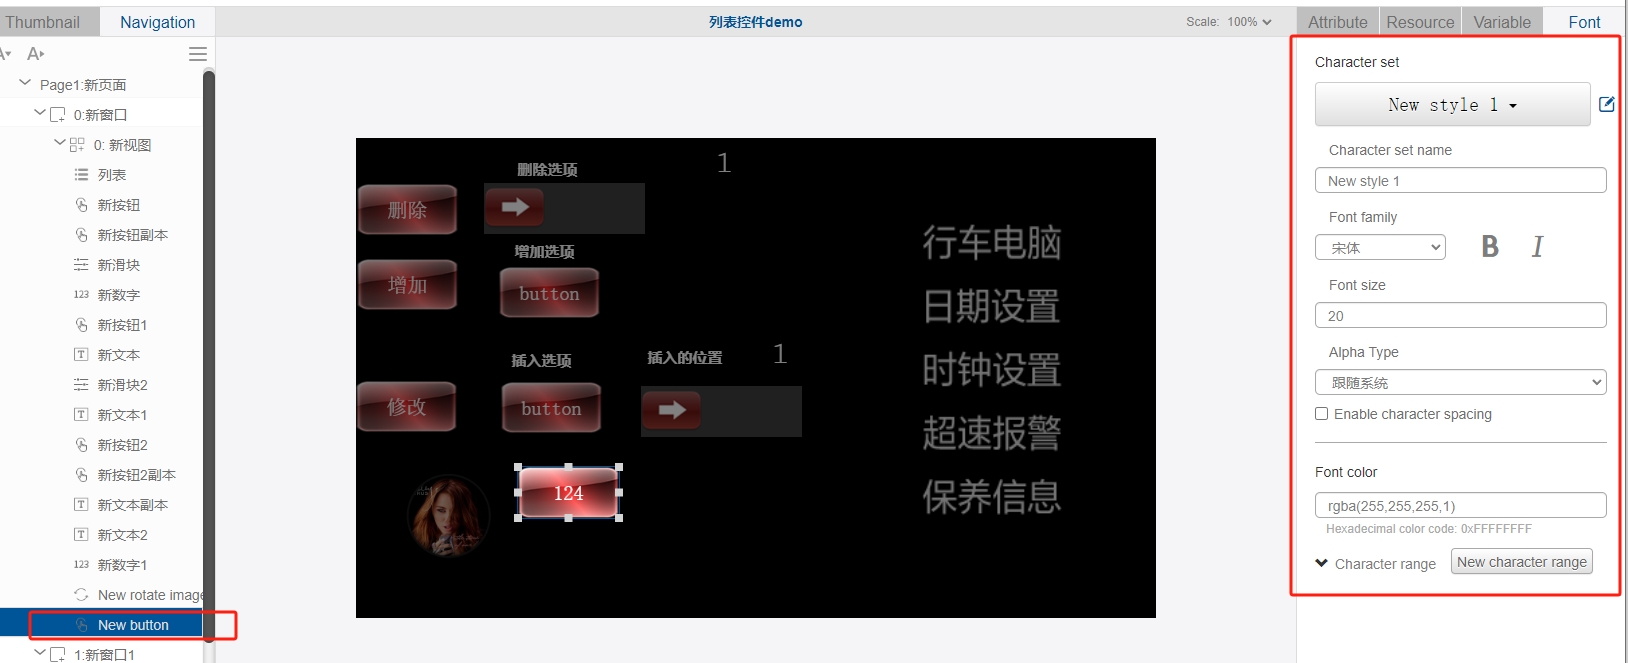
For controls that can set text and numbers, such as "TextBox", "Number", "Button", "Time ", you can set the font, size, color, transparency and other display effects of the text or numbers in the Font field.
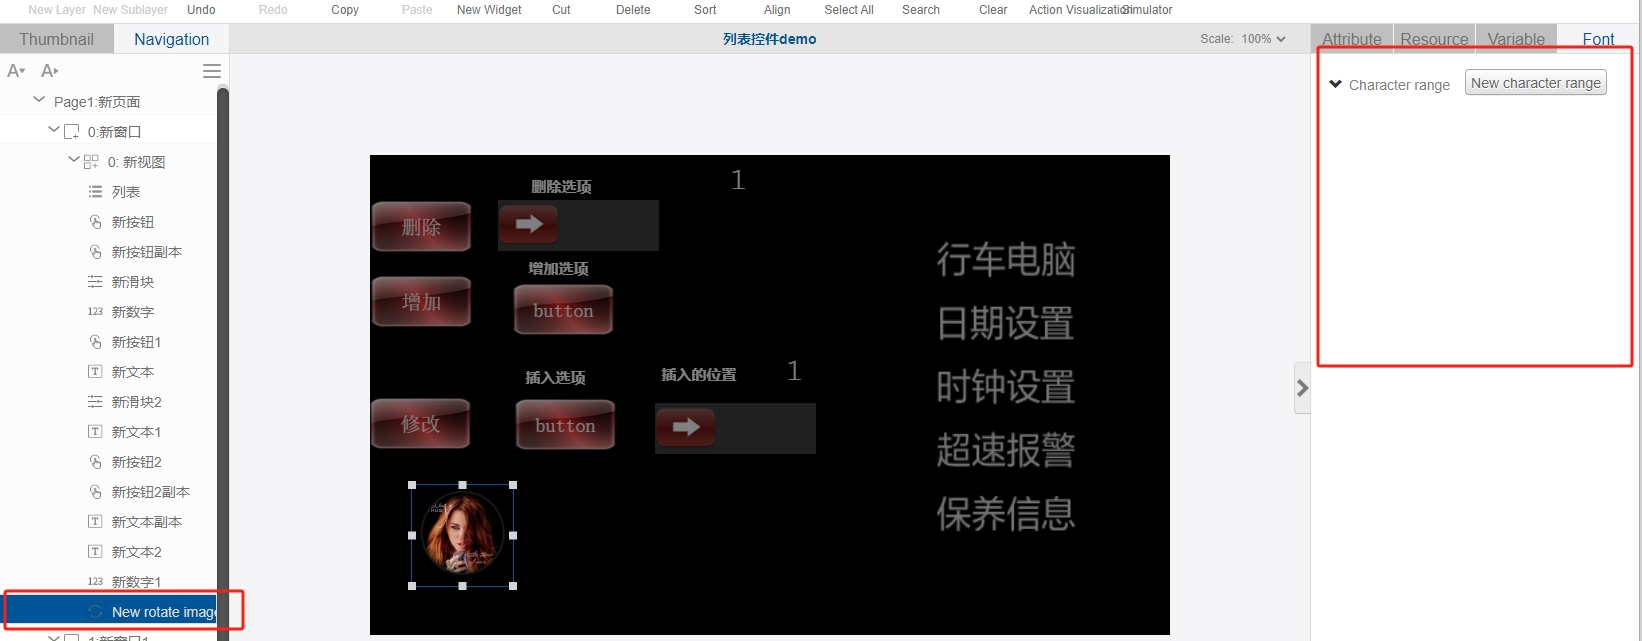
Only when you select a control that can set the font, the "Font" column will have content to display, and when you select a control or page that cannot be formatted with fonts, the "Font" column will be empty. As shown in the following figure, when the selected control is a rotate image (NewRotateImg), the Font column is empty; when the selected control is a button (NewButton) or a number (NewNum), you can edit the font, size, character spacing, character spacing (half-width), and color.
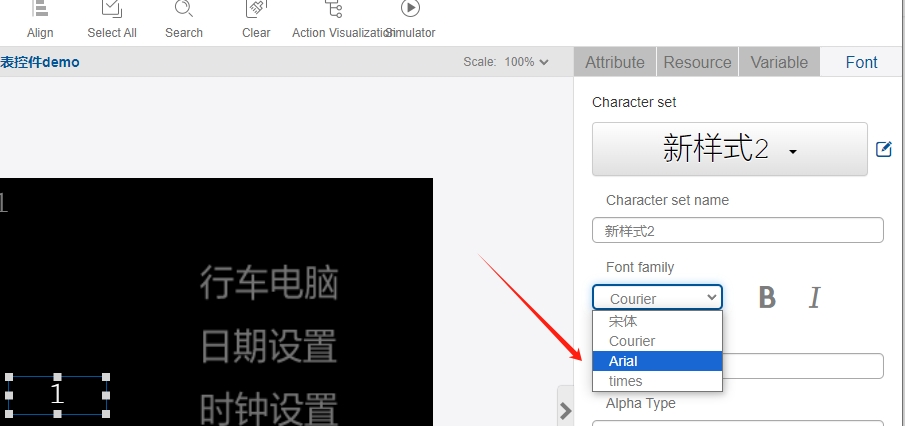
After uploading a font resource, the control is selected and the font bar displays a variety of font options. In the image below, Zekton is the font resource uploaded by the user. When you click to use the resource, the font will change.
The user can modify it according to the desired display effect.