Variables and actions
Variables
Variables are units of logic that can be assigned a value. Changing the value of a variable changes the display of all controls bound to the variable. A variable can be bound to more than one control, and a control can only be bound to one variable. As shown in the following figure, the function switch is bound to three variables (layer, slider, number).
Add new variable (i.e., custom variable)
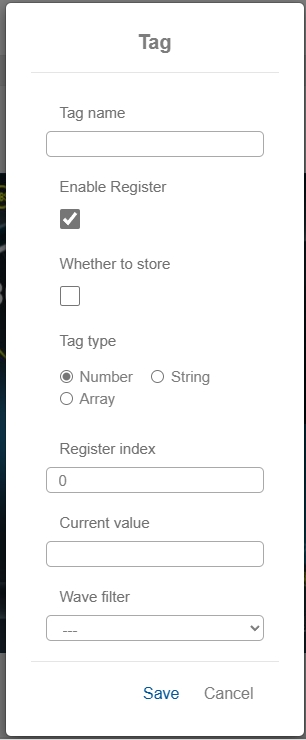
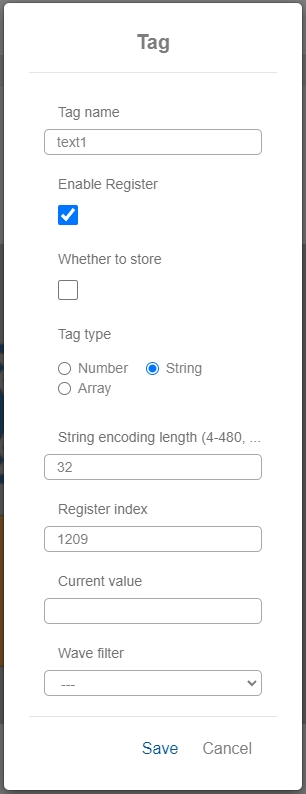
Click "Add New Variable" button will pop up the popup window for editing the properties of the custom variable, users can set the variable name and register number (It is recommended to increment the register number of the custom variable from 1000), the default variable type is numeric, if the variable needs to be bound to the text input control or QR code control, then the variable type needs to be changed to String. If the variable needs to be bound to text input control or QR code control, then the variable type should be changed to string.
If the variable needs to be bound to a text input control or a QR code control, then the variable type should be changed to a string.
Exported variables
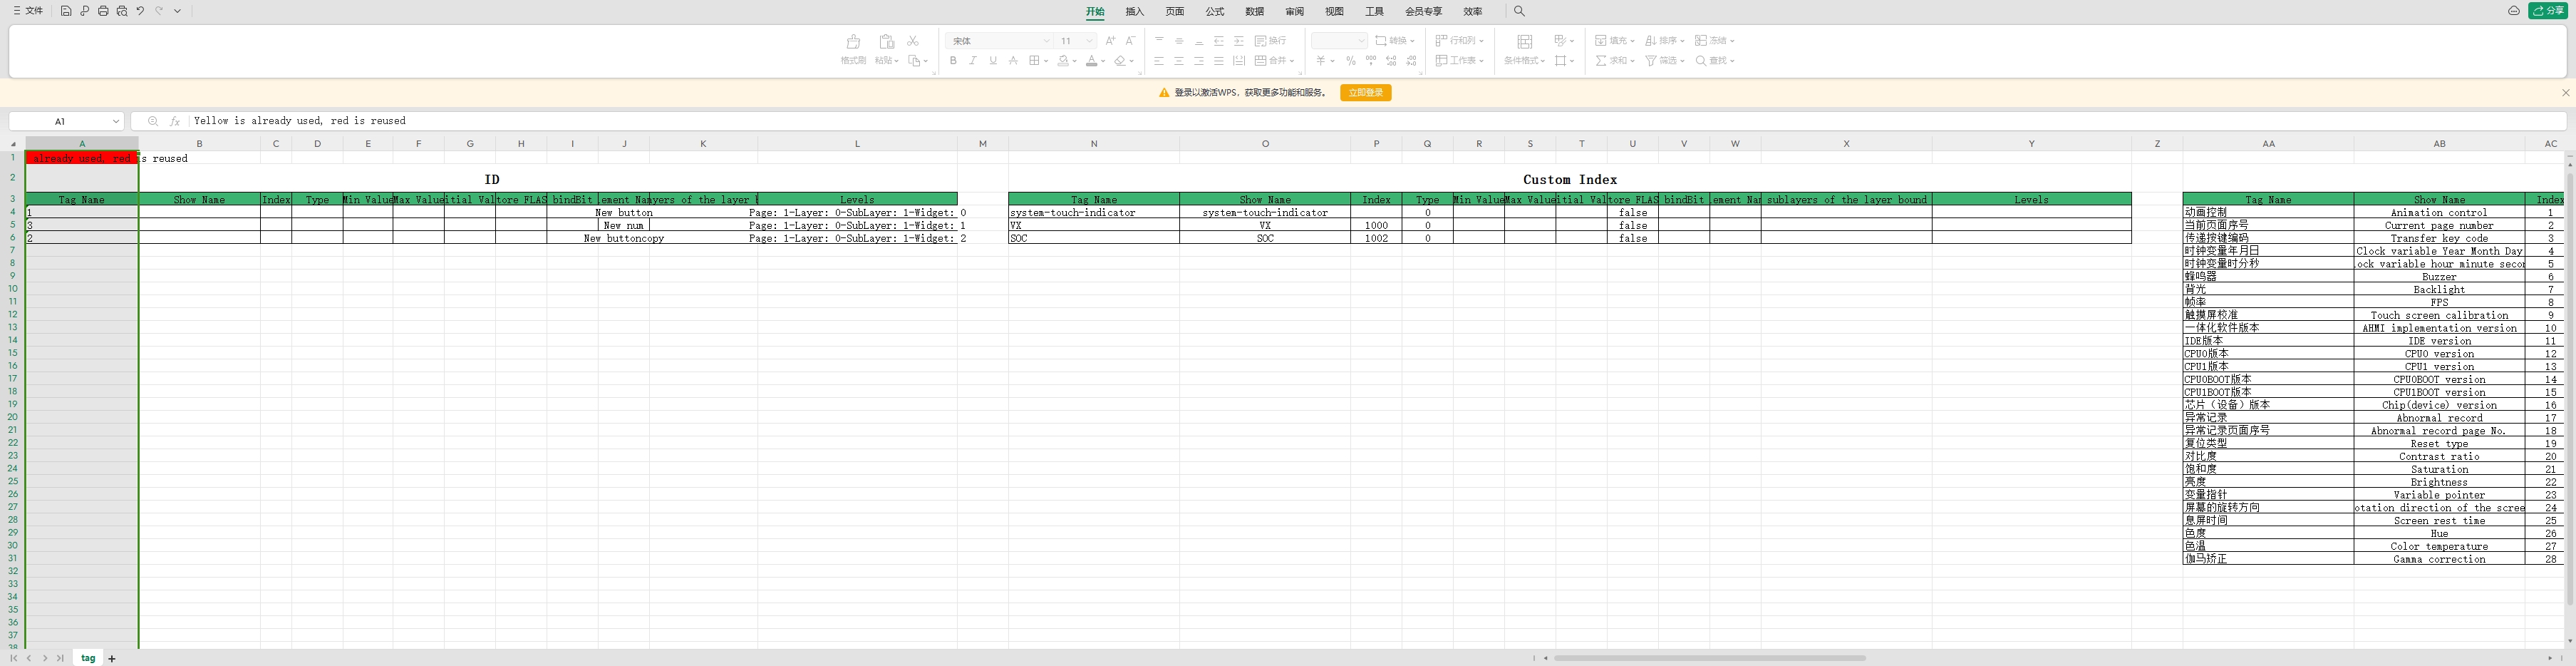
Clicking on the "Export Variables" button will generate an excel spreadsheet showing the register number of the tag as well as the minimum, maximum and current values of the bound elements.
Import Template Variables
The system has preset default variables, check the "Override renamed variables" to avoid variable renaming, if the UI has different themes and variables of different themes are not common, you can check Theme 1 or Theme 2 or Theme 3 or Theme 4, and then click "Customize Selection Import". At this time, a pop-up window of "Preset Tag List" will appear, check the variables you need and click OK to add them successfully.

File Import Variables
If the user has a large number of custom variables need to add then you can import them in bulk via Excel file, the recommended format of Excel file is ".xlsx".

The Excel file layout requirements: the first column from the left is the "variable name", the second column from the left is the corresponding "register number", the third column from the left is to set the corresponding type of variable (0-number type, 1-string type, 2-array type) . The third column from the left sets the corresponding variable type (0-number, 1-string, 2-array).
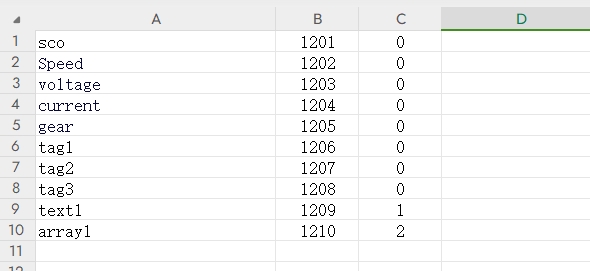
Click the "File Import Variables" button to import the variables in the Excel file and then you can view them at the bottom of the IDE's variable bar (if they are not shown, you can save the project and refresh it).


The numbers in the third column from the left in the Excel table are set to the corresponding variable types:


There are the following ways to assign a value to a variable:
1. Direct assignment
The initial value of the variable is set when the variable is added. If there is no other assignment operation, the variable is fixed to that initial value.
2. Register assignment
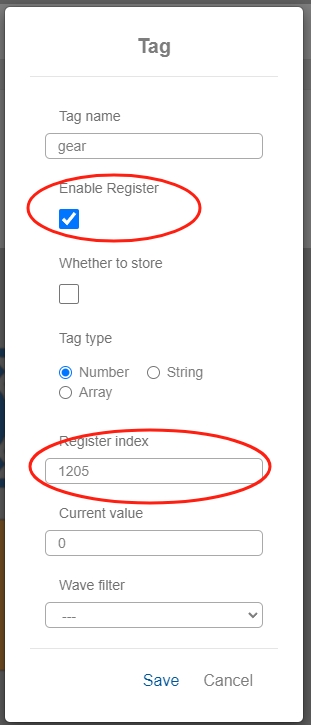
Variables enable registers, set the register serial number, and the value of the corresponding serial number register is dynamically assigned to the variable. Some serial number registers are reserved for the system, please refer to AHMI serial protocol for details. (For AHMI serial port protocol, please contact Sigma Electronics to get it.)
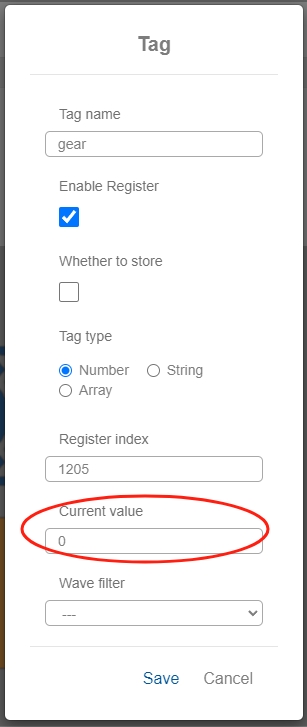
3. Whether or not to store
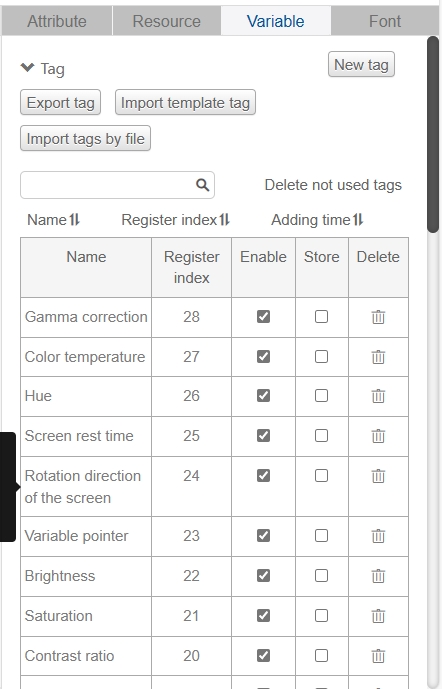
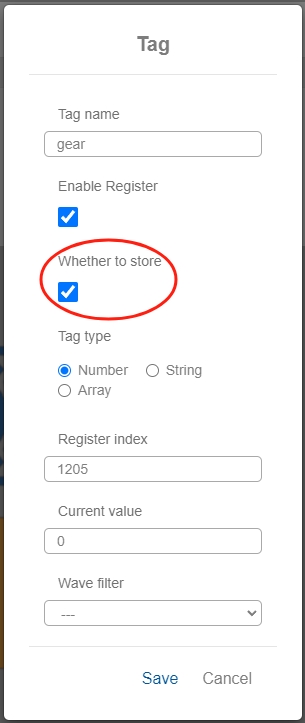
After checking "whether to store", the value of the variable will be written to Flash (see the first picture below), and the variable will show the value before power off next time when you turn on the computer, but it should be noted that we also need to write the value to Flash through the instruction in order to achieve the purpose of storing the value during power off. For example, in the second picture below, the "writeFlash" instruction is added to the action of the numeric control, and the trigger condition is "Tag change", i.e. every time the value is changed, the "writeFlash" instruction will be executed to change the value of the variable. The "writeFlash" instruction will be executed every time the value is changed to write the value of the variable to Flash.
Numeric control action:

4. Assignment of action commands
Action instruction assignment is the most common way to realize interface interaction. That is, through the action window, dynamically set the value of the variable, which is described in detail in the action subsection.
Action
The action list is in the property bar of the control, click the default action "action0" and set it in the popup action editing interface.

Each action consists of one or more instructions, and each instruction consists of one operation and two operands (operand 1 is a variable or timer, and operand 2 is a user-input value or a variable or timer), and after 1 instruction is executed, the value of operand 1 is changed accordingly.
A. Action Name
Default is action0, user can edit and modify.
B、Trigger Condition
Trigger condition is different according to the control:
For page and layer controls, the trigger condition is load/leave, which means the action is triggered when the page (layer) appears or leaves.
For button control, the trigger condition is press/release/long press, press means the action is triggered immediately after clicking the button, release means the action is triggered after releasing the button, and long press means the action is triggered cyclically if the button is pressed continuously.
_ For slide response control, the trigger condition is slide left/slide right/slide up/slide down, which means slide left, right, up and down for a certain distance (distance can be set) and then trigger the action.
For most controls such as progress bar, dashboard, etc., the trigger condition is enter low alert, leave low alert, enter high alert, leave high alert, tag value change.
C. Operations
Operation drop-down list, user can select the corresponding operation according to the need. Each operation has 3 operands, operand 1 can be variable or timer, operand 2 and operand 3 are enabled variables by default, user can choose variable or register, user can input the value after unchecking "Enable Variable". See the following table for the details and notes of the operation.
D. Add Timer Quickly
Users can quickly add timers in the action editing interface. Each timer is set by 6 commands: start point, end point, step length, time interval, current value and timing mode, which can be modified in the command list after adding.
E. Add Command
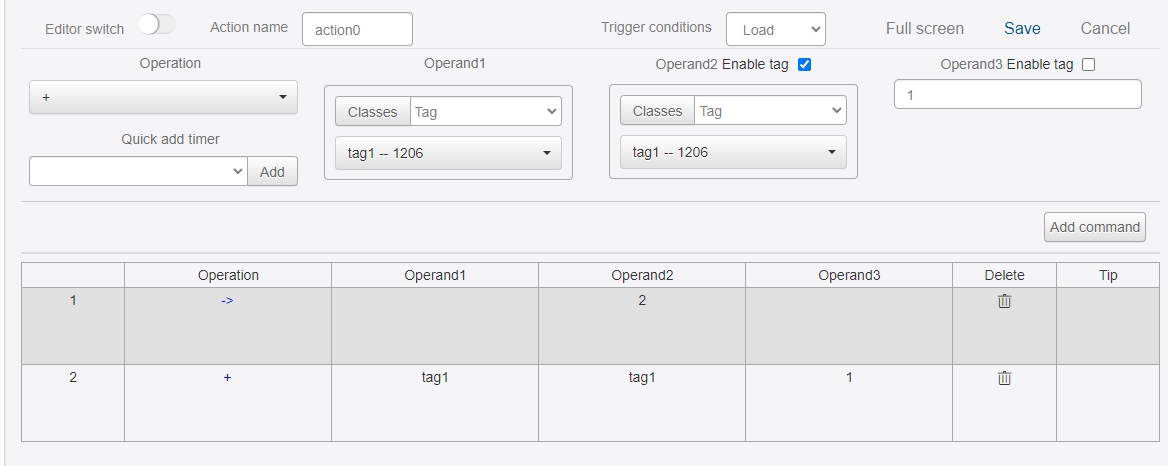
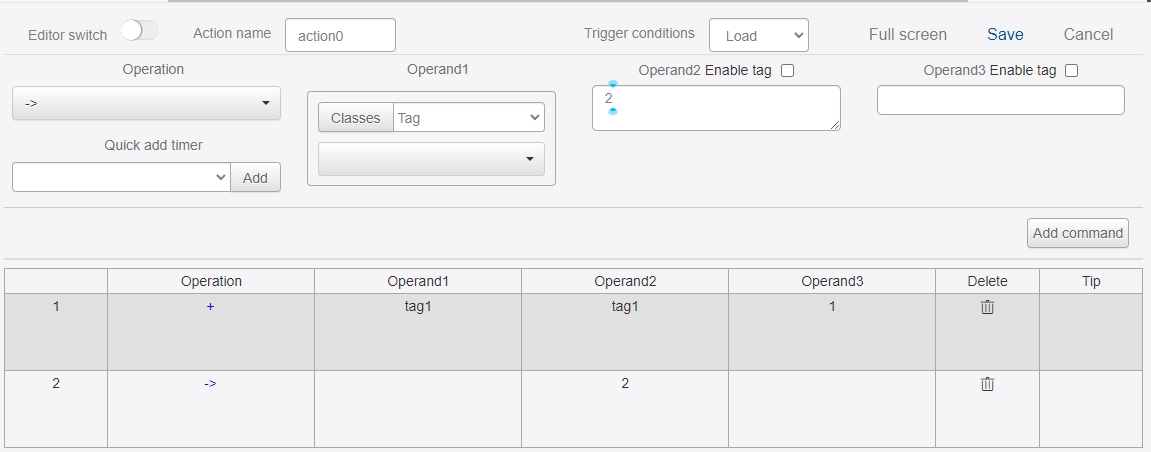
After the user finishes editing an operation, operand 1, operand 2 and operand 3, click "Add Instruction" button to finish editing an instruction. All the instructions edited in this action are displayed in the instruction list below.

The user clicks a line in the instruction list to modify the trigger condition, operation, and operand of the instruction.
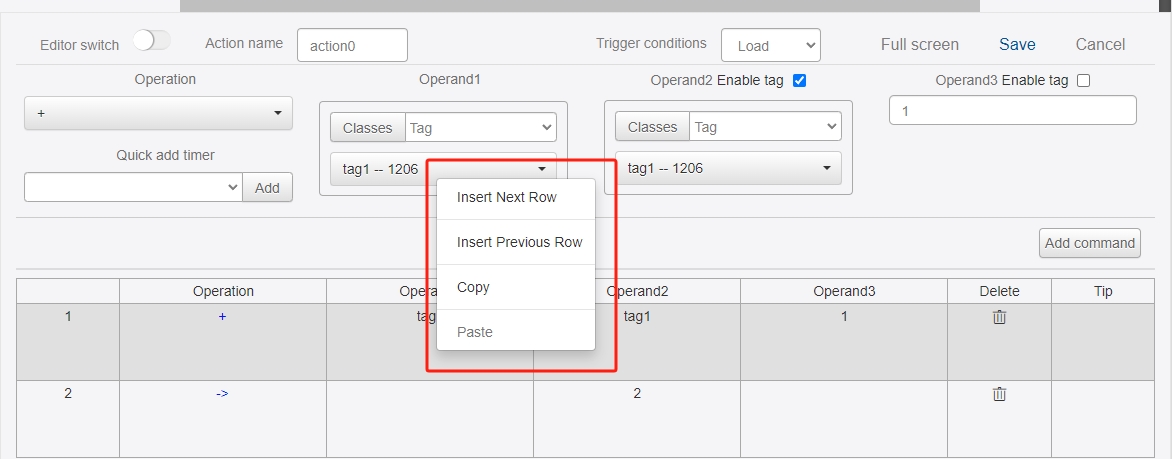
Right-click on a line in the command list, you can perform "Insert Next Line", "Insert Previous Line", "Copy", "Paste " operations.
Note:The naming of the jump page in the command group of each action should be left at the end, otherwise the other commands can not be executed due to the execution of the jump page first.
Error Example:
Correct Example:
F、Editor switch Click the "Editor Switch" button to switch to the pseudo-code editing mode, in this mode, you can quickly copy and paste the instructions and can quickly modify some of the characters, it is convenient to batch add instructions similar to the instruction statement.

G. Full Screen
Clicking "Full Screen" can maximize the visual range of the editor, which is convenient for adding, checking and modifying when there are many or complicated command statements.
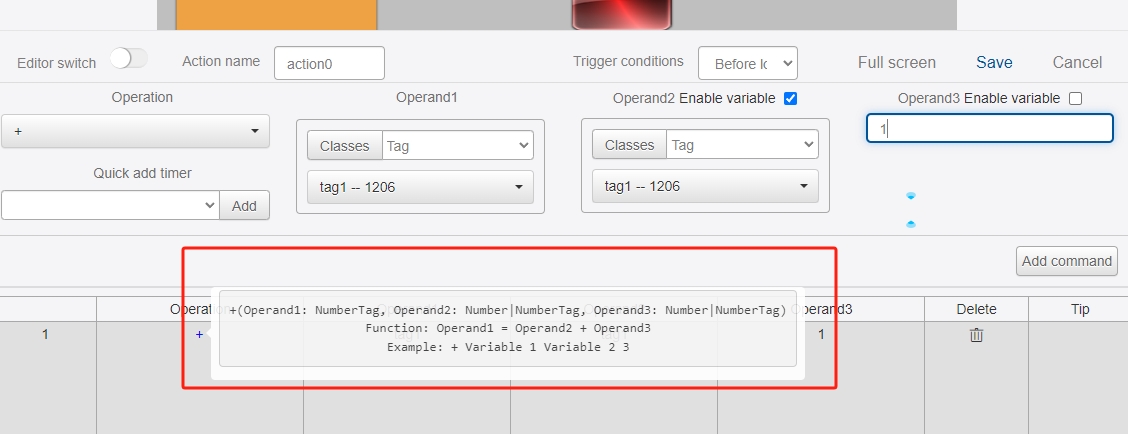
H、Operator Hover
In the system default editor mode, after adding an operator to the command line, if you don't know how to use the operator, hovering the mouse over the operator will automatically pop up the tutorial and example of using the operator.
I. Save
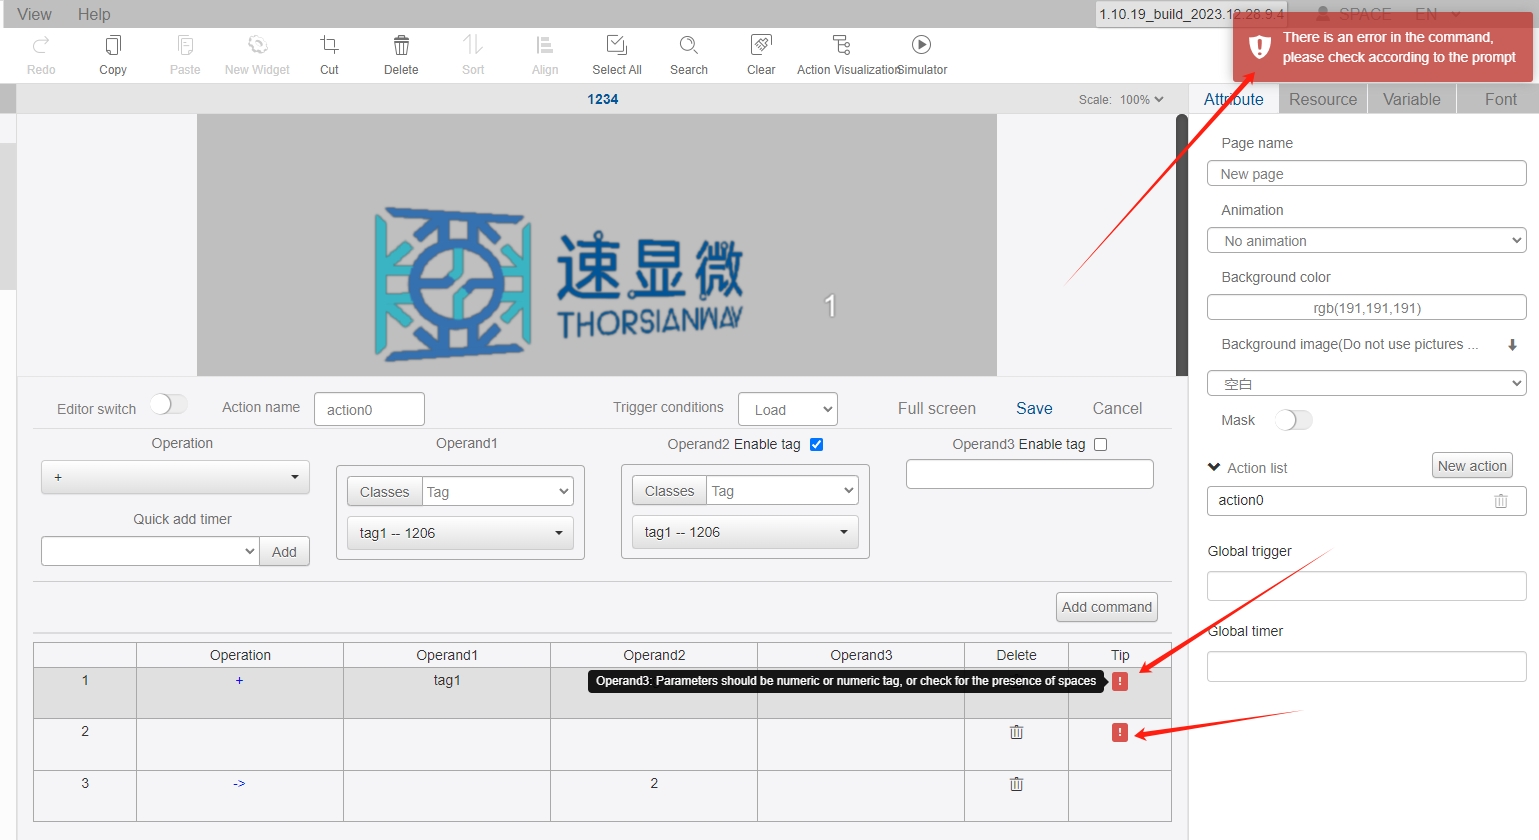
When the action of all the instructions in the end of editing need to click "Save" button, the system will automatically check all the instructions before saving whether there is any error, if there is an error in the instructions will be a pop-up window to remind (the mouse will indicate the reason for the error when hovering over the "!") and rejected. ) and refuse to save all the commands, you need to go back to modify.
J, the corresponding function of each instruction and how to use (if the picture display is not clear, you can right-click on the picture and choose "open picture in new tab"):
