Switch
The Switch control facilitates the user to control multiple switches from a single variable to save register storage space. The implementation principle is to convert the variable value to a binary number, and each bit of the binary controls a switch control, so one variable controls up to 32 switches.
Click the "Add Control" button in the Edit menu and select "Switch" in the drop-down list of controls.
In the upper right corner of the interface, the message "Add Widget Successfully" will pop up, and you can see the newly added switch control in the "Edit Area". Select the switch control, you can edit it in the "Properties" column.

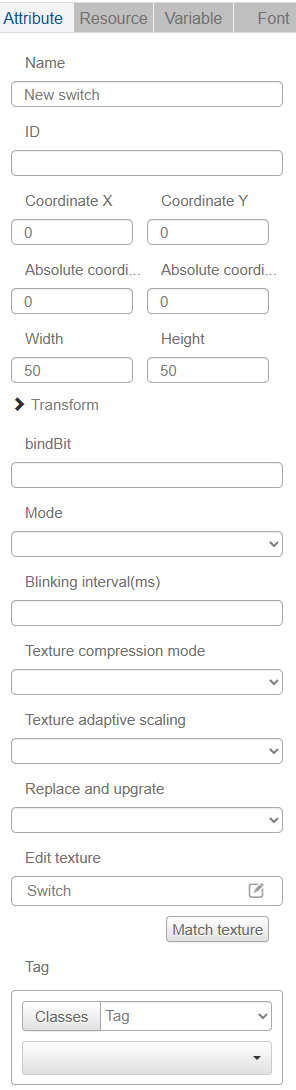
Name, ID, Coordinates, Width, Height, Block Touch, Transform, Texture Compression Mode, Replaceable Upgrade, and Texture are common attributes, which are introduced in the "Basic Design - Edit Attributes" section, so we won't repeat them here.
The "Variable" drop-down list allows you to select a variable to bind to the control. Binding variables to a switch control requires the bindBit setting to realize the on/off state of the switch.
"Text" is the text displayed on the switch, you need to press enter key to confirm the text input, and you can edit the font size and color in the "Font" column.

The "bindBit" is the order in which the switches are bound to the variable, numbered from 0. If there are N switches bound to the same variable (N is an integer not greater than 32), the value of "bindBit" for these switches will be 0,1,2,......,N-1. The value of this variable should be an integer, with the minimum value being 0, and the maximum value being the second power of 2 minus 1. For example, if you set 5 switches to be bound to the same variable, the "bindBit" value of these 5 switches will be 0, 1, 2, 3, 4. The value of the variable to which they are bound will be an integer from 0 to 31. Changing the value of the variable will change the display of the whole group of switches.
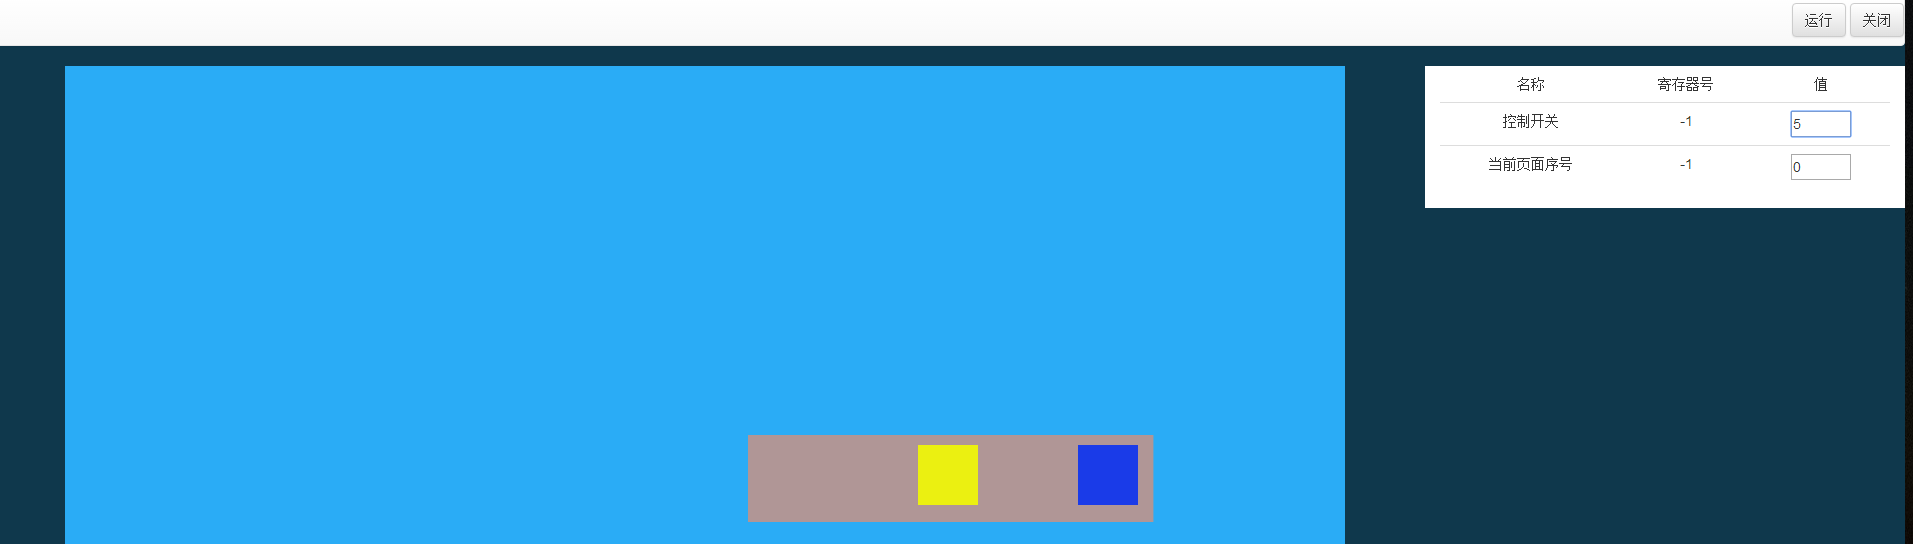
The following table shows the list of switches with different bindBit values by changing the values of the bound variables.

For example, the switches in the figure below are bound to the same variable, and from right to left the bindBit values are 0, 1, 2, 3, and 4.

Then the effect realized by different input variable values can be displayed in the running debugging interface as: